29 February, 2012

Hanging Basket Quilt - Still on a Roll


I am over the  moon and inside out!  Two, count 'em, TWO finished quilts in one week!  That is definitely some kind of record for me!

This is my Hanging Basket Quilt.  I had wanted to hang this quilt from the side of our barn to get a great photo in natural light, but it is raining cats and dogs here and I couldn't wait to post my photos. Maybe when the sun comes out.... in June... it's Oregon...

I blogged about this quilt way back in September of 2011.  Scroll down. The blocks measure 10 inches and they were made using the paperless paper piecing method.  I dearly love making blocks this way. Paperless paper piecing allows for exacting precision and blocks just seem to go together better when they are paper pieced.  For the first time ever, I had someone else do the quilting.  It was done on a long-arm machine, aptly named "Gertrude", by Jeanne E., the custom quilter at my local quilt shop, "The Country Lady". http://www.countryladyquiltshop.com/   Jeanne did a stunning job and photos here do not do justice to her quilting prowess.  It was a big decision to hand off my work to someone else to do the quilting, but I felt that I just did not have it in me to hand quilt this thing.


So when Jeanne called to tell me that the quilting was completed, 
I was at The Country Lady in a flash to pick up my quilt.  

I spent all day today working on the piped binding.  See it pictured above, along with a peek at Jeanne's  beautiful free-motion feather quilting from the back side.


Each block is a bit different from the next.  I keep looking at the quilt, saying to myself, "that's my favorite block", then I look at another and pronounce it to be my favorite block.  I could go on and on.  I love them all.  Can't wait to do more of this small and precise paperless paper piecing

I promise to post that future photo taken with our old barn as a backdrop, just as soon as the weather cooperates.


Hung on the side of the barn.

Finally!  With the help of Mr. T., I managed to get this quilt photographed, a task that is not quite as easy as one would expect.  I put a long bamboo pole into the sleeve, then we both climbed big ladders to lay the pole on two very large nails hammered into the barn siding.   It's a big quilt, 94 x 94 inches, so I had  move WAY back and stand on a ladder to snap my photos.  I had thought that I would want to take these quilt photos in the sunshine, but soon found out that the quilt was completely washed out in bright light, so down it came.  We put it up again early the next morning while there was still a bit of cloud cover.  Much better results and a lesson was learned.

I have photographed a few quilts hung on that same bamboo pole, laid on those big nails on the side of our big ol' barn, but this is the very first quilt that has hung PERFECTLY square!  I'm pretty excited about that!

26 February, 2012

On Being Productive


I finished a quilt today.  Notice just how very casually I make that statement.  I'm really just trying to be super-cool, tempering my glee, and not typing too many exclamation points here.  It has been a very long time since I have completed an honest to goodness bed-sized quilt.  So before I burst, here are my exclamation points!!!!!!!!!!  I just could not help myself! The quilt looks rather nice here on the antique iron bed in our teeny guest room, don't you agree?.

There is a very real sense of accomplishment for me in completing such a project, especially since I have felt like somewhat of a fraud as a quilter for some time.  I called myself a quilter, but it had been a long time since I had actually produced a body of work.  But I am happy to say that I am presently on a very real productive roll here, having finished a number of things lately.

This is my Bear Paw Sampler quilt, one started just because I thought I might be actually be able to complete it.  I began it in September of 2010 as the Block-of-the-Month project for my Quilters' Guild.  Each month we received a variation of the Bear Paw pattern. I thought that I could certainly manage to get just one block made per month, even while shouldering my duties as Guild President to 110+ of the most creative and accomplished quilting ladies imaginable.  I actually told myself that I would be such a very sad and hopeless case if I could not complete even a single block per month.

So I puttered away, making my one block each month, each one just a bit different, and then put them together with sashing that I thought looked interesting.  Along the way,  I decided to actually quilt the thing on my Bernina.  I broke it up into units and then put the units together after quilting.  I added the scalloped border to make it fit on it's intended bed.  I'm not completely thrilled with the results since I am always my very own toughest critic, but then I am just beginning to do machine quilting, so it's not really so terribly bad.


The good news is that if you kind of sqiunt at the quilt, it appears to be heavily quilted, which was my goal and intention. And the quilt is comfy, seriously cozy and comfy.  I know this to be a fact because I actually nap-tested it this afternoon.  I was completely bagged after hand stitching all of the binding.  PHEWWW!!!! My fingers are raw and sore!  They only bled on the quilt twice.  Had to dig out the Hydrogen Peroxide to removed the blood stains...

I supposed that I can't expect perfect quilting results as a beginner.  I kind of call this exercise a Life Lesson.  I have almost always had success at most anything that I try.  I am a pretty good hand quilter if I do say so myself... but not so much with this machine quilting stuff.  I know that it will take lots and lots of practice to become as proficient as I would like to be.  But that's OK.  It's the learning process that I enjoy.  I'll get there, eventually... with time and patience.  And sore fingers.

15 February, 2012

Who's on Pinterest?


OK, I just have to say, I am so LOVING Pinterest.  For those of you who have yet not taken the plunge, Pinterest is an online pin board, wherein you "pin" things that you like or love, things that move you, amuse you or just interest you.  Think "collections"..., virtual collections, perfect for those of you who have limited space for real collections. There are tons and tons of interesting recipes and cool ideas.  I love having all of these super ideas for future use stashed/pinned all in one place, kind of like my own personal library of fun stuff to do.  I have files and clippings and ideas floating around in my head, but Pinterest helps me to virtually catalog them all.  Whatever your interests are, Pinterest has even more ideas for you.  I have my fingers crossed that I will have a long enough life to make all of the things that I want to create.  Thank you, Pinterest, for keeping my inspirations and ideas organized.

31 January, 2012

Meet Georgia, my Singer Featherweight


Say Hello to my girl, Georgia, another one of my Fabulous Vintage Finds.  She is so named because she found me at an estate sale when Mr. T. and I lived on the South Georgia coast on Oak Grove Island. I swear, I heard her calling to me the moment we walked in the door. She was sitting on a table in her case, all snapped up.  I opened the case while trying to still my beating heart...  I took a quick look inside, slammed the case shut, looked all around to see who was going to try to take her from me by force and then carried her away to show her to Mr. T.  He and I usually discuss our estate sale purchases, decide whether it is a "want" or a "have-to-have", but this time I just announced to Mr. T. that we were buying this and he did not even question me.  There must have been something in the look on my face.

I knew that the price of $90.00 was basically a STEAL!!! since these little beauties in good conditin usually go for upwards of $400.00, with ones in pristine condition going for even more.  Georgia has a little decal wear forward of her needle plate, but that just shows that she has been a hard worker over the course of her life and I love her for that. She came with her original case, tons of attachments, bobbins, the original instruction manual and the original oil can.

She gets to do a bit of traveling these days.  I take her to workshops and classes, where she is often the Belle of the Ball. As you can see, she has been gently used and well cared for.  She's looking pretty snappy for 75 years old, don't you think?  Seriously, I hope that I look that good when I am 75.

Oh,... and did I mention that she sews like a dream? She positively purrs....


Georgia has the lovely Egyptian scroll work on her end plate, a beautiful touch by Singer that is prized by collectors. I was able to learn her manufacture date by her serial number. She was born on March 15th, 1937, which makes her a seriously senior Featherweight model, a real Golden Girl!.  These machines were manufactured by Singer from 1934 to 1961. They still function as they were intended to all those years ago.  They are lightweight and portable, but they are also little workhorses. My Georgia is a genuine peach, a real, honest to goodness Georgia Peach!

13 January, 2012

My BEE-SHARP Thread Catcher


As I mentioned in an earlier post, I have been working on the new design and pattern for a Thread Catcher that my Guild-mates and I will make and sell at our Annual Quilt Show in April.  These sewing room necessities are always big sellers for us. I have just finished my prototypes and they turned out pretty nicely, don't you think?  There are three different detachable pincushion designs to choose from and each one has a needle sharpening pad filled with emery. I suppose that I could have called this "The Have It Your Way Thread Catcher", with those three different pincushion options,  but... I'm captivated by bees, hence the name, BEE-SHARP. I hope that my Guild friends have as much fun making these as I did. The fun is in choosing the fabrics that go together in just right way.

Scrappy Strip Version
Color Block Version
Lattice Version

08 January, 2012

Smoked Chicken, Spinach and Bacon Pasta


Years ago, when our family lived in the Sierra Foothills near Auburn, CA, we enjoyed eating at "Original Pete's", a little restaurant on Highway 49 that served delicious Smoked Chicken Pasta.  This is my copy-cat version or that dish. But honestly, mine is even better than the one that I copied. I'm just sayin'...

You can vary the ingredients for the pasta to suit your tastes.  We've tried a number of combinations.  Sometimes we use artichoke hearts, olives and fresh tomatoes.  We have also used roasted red peppers, olives and feta,   You can use any combo of ingredients that suit your tastes, or ingredients that you have on hand.  Remember, it is the smoked chicken that is the BIG STAR here.

It's easy to smoke your own chicken.  I use a Cameron's Stovetop Smoker, available through their website www.cameronscookware.com  or through Amazon.com.  You can choose your own favorite wood chips to use and it's been fun trying different ones. I used hickory chips for this recipe. We have also tried alder, oak and sometimes we add a bit of  mesquite. I find that mesquite is often too intense to use alone, it can taste somewhat bitter, but it's nice to add a few mesquite chips along with another wood chip flavor.

So, as you read this recipe you may think that this is a lot of work.  True,... this is not a quick recipe to make, but the chicken makes it SO worth the time it takes.  I usually make a double batch of the smoked chicken and have the leftovers cold on a salad for lunch.  Delicious!


Smoked Chicken, Bacon and Spinach Pasta  - Serves Four

1 package fresh chicken tenderloins
1/2 cup bottled Italian dressing
3 or 4 cloves garlic
1/2 pound linguine pasta (farfalle is also good)
1/2 pound fresh baby spinach
5 or 6 slices of bacon
3 slices white onion
1/2 tsp. oregano
1/2 tsp. thyme
1/4 tsp. cayenne
1 tbs. olive oil
1 tbs. grated parmesan
a little chicken broth
a little white wine
fresh grated parmesan for garnish
chopped green onion for garnish
4 lime wedges

OK, here we go.  I prepare the chicken early in the day. I wash and pat dry the tenderloins.


Then cut off that little membrane thingie...


And cut out the tendon, or whatever that thing is...


The next step is to marinate the tenderloins in a zip-lock bag with one of the garlic cloves, minced or pressed, and 1/2 cup bottled Italian dressing.  Refrigerate for about 4 hours.

When ready to cook the chicken, I turn on the grill to high heat.  While the grill heats, prepare the smoker by lining the pan with foil.  I also cover the tray with foil.  Clean-up is much easier if you do this step.  Add about 1 cup of wood chips and 1/2 cup of water to the bottom of the pan.


Then place the tray and rack on top of the chips.


Place the smoker on the heat source.  Our grill has a burner on the side and I find that this works perfectly for me.  I know, the smoker is called a stovetop smoker, but trust me, you do not want to use this thing indoors.  I have also used an inexpensive hotplate outdoors when I did not have a burner on the grill.  Turn the heat on high in order to get the wood chips smoking.  Once that happens, turn the heat down to low.  

Now, grill the chicken at high heat, just long enough to make nice grill lines on the meat, usually about two minutes on my grill.  Turn and grill the other side until the meat no longer looks pink.  Don't worry about grill lines here, you just want to make sure that it's not pink.  You want your tenderloins to be a smidge underdone.


                                                                       Looking good!


Next, place the grilled chicken on the tray of the smoker, taking care to leave a bit of space between each piece.  Then close the lid and smoke for about four minutes.  The temptation is to open the lid to see just how much smoke you have going, but try to resist.  After the four minutes are up, turn off the burner and let the meat sit in the smoke without heat for an additional six minutes.  It's still smoking in there, I guarantee it, but by turning off the heat earlier you are less likely to have dry chicken.  But really, folks, smoked chicken is good even when it's on the dry side.  


Remove the chicken from the smoker to a plate.  Cover with foil and set aside.

Now, I get my ingredients together for the pasta part of this recipe.  Boil water for the linguine, add a bit of salt if that's how you like it.  Slice the bacon into small pieces and cook in a large saute pan until lightly browned.  


Drain on paper towels and set aside.  I pour off nearly all of the bacon grease, leaving just a tiny bit in the pan for sauteing the spinach.


 I take the stems off of the spinach leaves and cut the onion into pieces.  My photo does not show it so well, but you need a MOUNTAIN of spinach.  It cooks down to nearly nothing so you need lots.  When you think that you have enough, add more.  


Add 1 tbs. olive oil to the pan and saute the onion for about 1 minute, then add two or three cloves of garlic, pressed.  Next, add the spinach and stir gently while it cooks down.  


Add bacon bits, reserving a few for topping, oregano, thyme and cayenne.  I add a little chicken broth and a little white wine at this point and stir for a minute to reduce.  Sprinkle on the parmesan, stir it in, then remove from heat.  Do not overcook.

Drain the pasta.  I add a few drops of olive oil, then stir it so that the pasta does not stick together.  Put a serving of the linguini on a plate and top with the spinach mixture.  Garnish with a little fresh grated parmesan, chopped green onions and the remaining bacon pieces. I gently warm the smoked chicken in the microwave, heating at 30 second intervals.  Two chicken strips are usually enough for a serving.  We like to squeeze a wedge of fresh lime over the top or of it all.  

Enjoy!   

02 January, 2012

Bunny Quilt


Some people do Spring Cleaning, but I do After the Holidays Cleaning. Yesterday I was tidying up my walk-in closet, otherwise known as the wade-in closet, and came upon a quilt that I had made a few years ago.  I have kept it rolled up on a cardboard tube to keep it pristine until the time comes to give it away to just the right baby girl, hopefully, a future grand-daughter.  I have my fingers crossed.  We still have two children who are sans offspring. (Really, no pressure here, Butterfly and G-Man...)  I made it just because I loved the fabrics and,well,... just because I dream of a grand-daughter one day. And hey, if I don't get a grand-girl, maybe it can be for a great-grand daughter.  By that time it will be VINTAGE!!!


I hand appliquéd the bunnies and carrots and then hand quilted the rest of the quilt.


Detail of the quilted carrots in the border.


I drew out and added the sweet little quilted carrots in the borders.  The only machine work that I did on this quilt was the sewing on of the binding, but I finished the binding by hand.  This quilt won a first place in my class at the local quilt show as well as a first place at the county fair.

The Bunny template is from "Baby Patchwork", by Gianna Valli Berti.

So, to my much wished for future grand-girl, whoever you are, this quilt is waiting for you.  Come claim it for your own.  Grandma loves you...

August 31, 2018 - HAPPY UPDATE!  This quilt has a soon-to-be-born owner and is already happily ensconced in it's new home, the sweet nursery of Baby G., due to make her appearance on or around November 12 ,2018.  This quilt does not match the lovely nursery as far as colors go, but it was gratefully received.  And I'm making another in soft greys and blush pinks.  I'm just so happy to be able to see it in it's new home! And, of course, I can't wait to hold our new grand-girl!


06 December, 2011

"Chubby Chicks Quilt"! Finished at Last!


Finished at last! I woke up at 4:30 yesterday morning and knew that this was nature's way of telling me that it was time to get this quilt bound. I love working at my machine early in the morning. It is dark outside, the coffee is hot, the house is quiet and Bozz, the cat, is especially chatty. And then... I watch the sun come up.  It's my most favorite time of the day, I think. I had the binding finished before Mr. T. even got up.


I machine quilted these cute little curly tail feathers, not my original design, but one that I found online that another quilter had used for her Chubby Chicks quilt.  Sweet!


I am very happy with the way that my piped binding turned out.  I have only used this technique on smaller items, never on an actual quilt.  All four corners matched up perfectly!


02 December, 2011

Moving Right Along - "Chubby Chicks" Quilt

Under the needle.


I am so excited to be nearly done with my "Chubby Chicks" quilt.  I should probably say that I am so excited to be finishing ANY quilt.  The machine quilting is done and actually went better than I expected.  I am rather new to free motion quilting so this is kind of a big deal for me.  I will be using the piped binding technique that was taught to us by Guild member, Doris K . Stand by for the finished product.

26 November, 2011

Bee Skep Salt and Pepper Shakers


Mr. T. and I are hard-core estate sale junkies and we love to find fun old things that fit just right into our old home. If those finds are a bargain, that's even better yet. These bee skep salt and pepper shakers are one of my very favorite Fabulous Vintage Finds. We picked them at an estate sale for six, count 'em, SIX whole dollars!  They are my kitchen salt and pepper shakers, good sized at around five inches tall, and they sit beautifully poised near the range for use while I am cooking. They're marked "Japan" on the bottom, and I have not been able to date them, but they appear to be old.  Online research makes me guess that they are about 40-50 years old.

Mr. T. and I were recently visiting John Day, in eastern Oregon, and happened to find the sugar and creamer mates to our salt and pepper shakers.  They were waiting for us in a stifling hot little antique shop on the main street that runs through John Day.  How could we resist them?  They were not the killer bargain that the salt and pepper shakers were, drat..., but sometimes you just have to pay real money for really great old things.  I suspect that there is a matching honey pot out there somewhere, just waiting for us to find it. Or... maybe a matching teapot! That would be the Bees Knees!, wouldn't it?


Update! Holy smoke, while perusing Pinterest, (my new most favorite thing,) I found my oh-so-elusive matching teapot! But, darn, it was already sold at an online auction site.  But the good news is that my hoped for teapot actually exists, and it's out there, waiting for me to find it.  I'll find one, out there somewhere, someday, I'm certain. Wish me luck!


25 November, 2011

Fall in the Burg


We have had the most beautiful fall here in the Burg, with mild temperatures, more sunny days than we usually see at this time of year and not too much rain. One of our Japanese maple trees is losing it's leaves in a big way just now.  They will all be on the ground in a day or two, so I just had to take a photo before they are all gone.


   The leaves even look pretty once they've fallen to the deck.  I'll be sorry to see them gone...

24 November, 2011

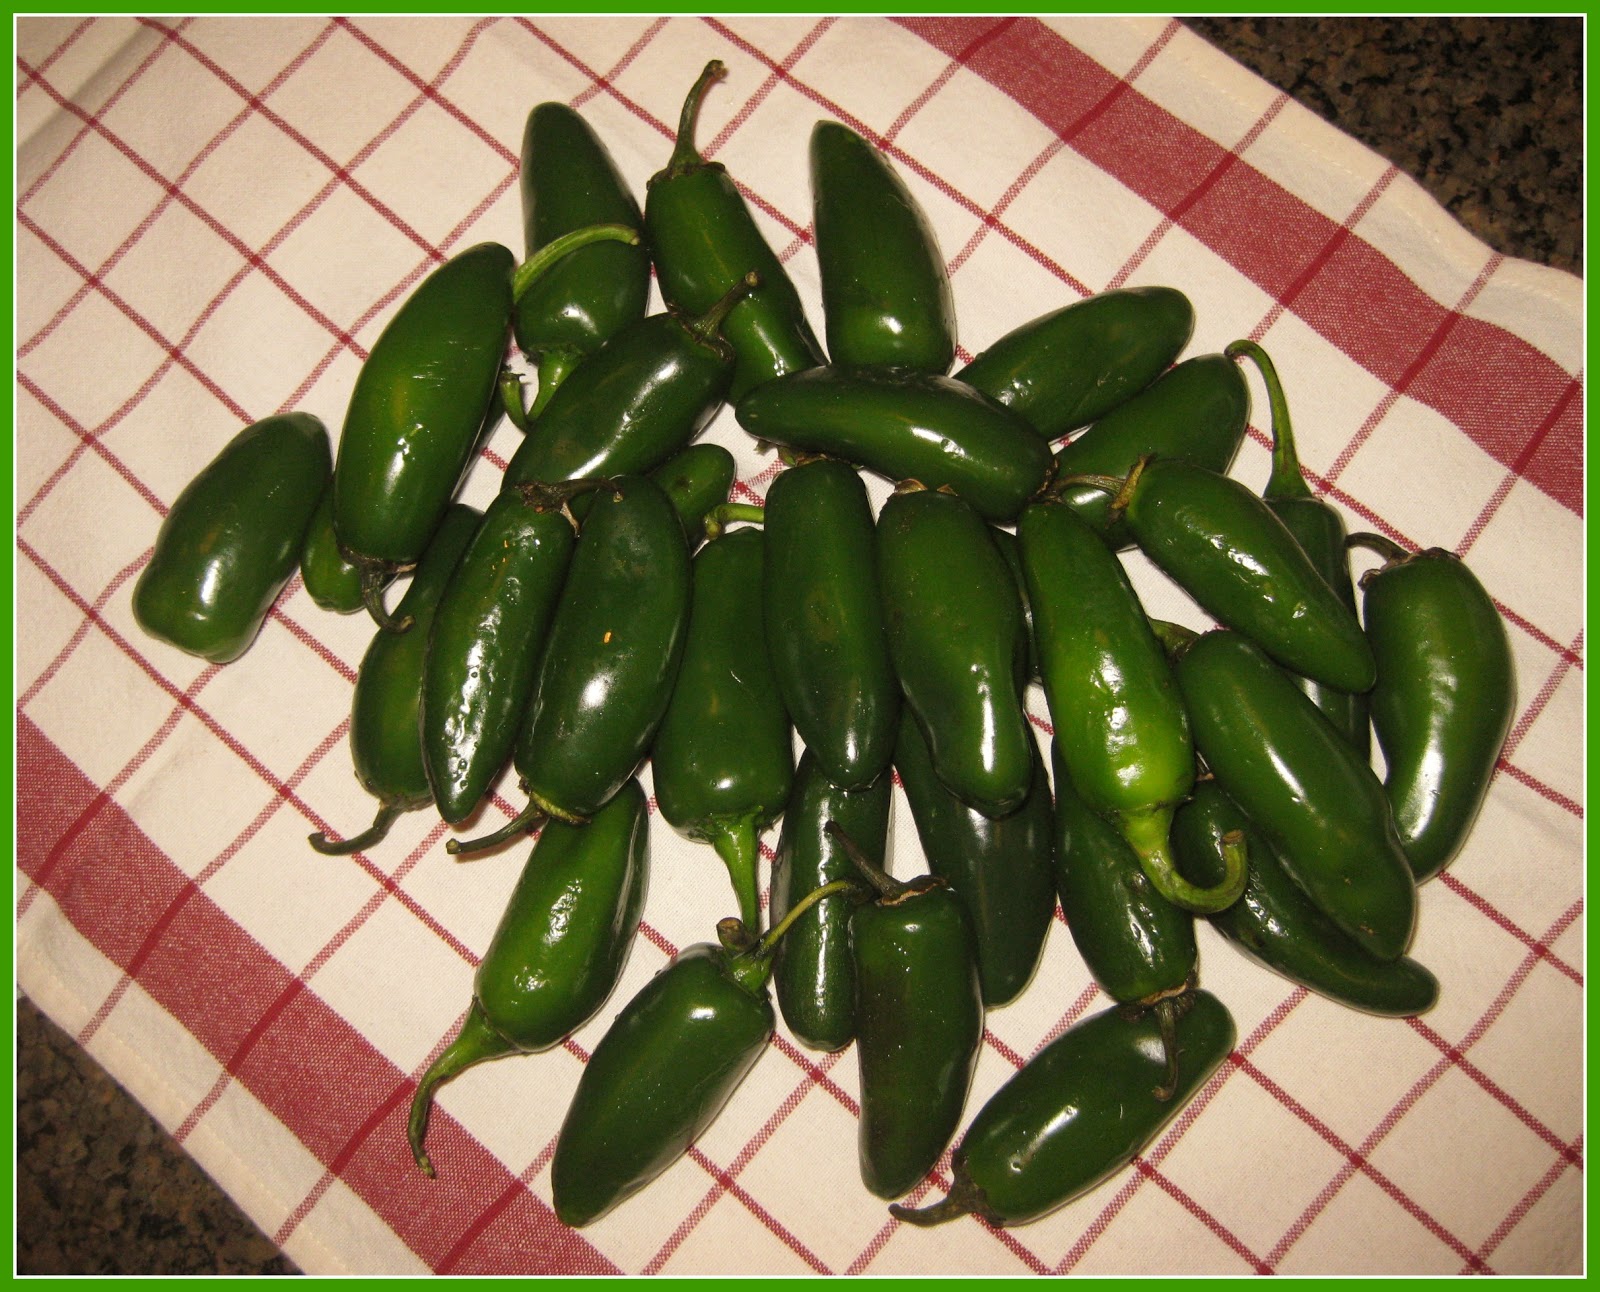
Jalapeno Thingies

It's Thanksgiving and during a lull in the meal preparation madness, we made Jalapeno Thingies, tasty
hors d'eouvres that have become a holiday staple for our family.  There is a bit of work involved, but they are so very worth it. I would never dream of eating a raw pepper, but somehow, cooking them takes away lots of their punch.  They're beyond delicious!


Start with about 25-30 small jalapeno peppers.  Wash and, dry them, then cut off the stems, but don't cut off the entire stem end.  Think of the peppers as being little boats that will hold the filling.  Oh, and don't forget to wear rubber gloves. I learned the hard way that the your hands can burn for hours after prepping these things. Slice the peppers in half lengthwise, then make a small slit at the stem end, as pictured below.  This will help you to pull the seeds and membrane out of the pepper.


We stuff ours with plain old cream cheese, but you can add a mixture of  feta, parmesan, herbs or whatever you like to the cream cheese.  After stuffing them, we add a piece of par-cooked bacon (par cooking really cuts down on the grease), or prosciutto.  We used to wrap a strip of the bacon, (cut in half the long way, then cut the strip into three portions) around the pepper but felt as if this was too much. I'll be honest here.  Wrapping the peppers with a slice of bacon is prettier, and I'm all about how things look... makes things more appetizing, don't you think? But for just us, the strip is fine.  If I were serving these to non-family or taking them to a party, I would do strips. We have used pieces of both here, half are topped with bacon, half with prociutto.  I like to put them on a wire rack and that goes on a cookie sheet.


Bake in the oven at 375 degrees for 20 minutes or until the meat is cooked and the cream cheese begins to brown.  That's it!  They're done!  They're so delish!  E-mail me and tell me how much you love them.  beesknees52@gmail.com  .


31 October, 2011

"Chubby Chicks Quilt"


Shame, shame on me!  I've started another quilt before finishing the Hanging Basket quilt pictured in an earlier post.  But I could not resist this one.  It's called "Chubby Chicks" and the pattern is from Black Mountain Quilts.  A word to the wise here... If you are going to search for this pattern online, Google "Chubby Chicks QUILT".  If you leave out the word "quilt" you will see more in the way of really big girls in various states of dress and undress than you ever wanted to see.  Seriously!


Although I liked the colors on the pattern photograph, GREEN is my most favorite color...I wanted to vary the colors from the ones pictured on the cover of the Black Mountain pattern posted below. I chose Moda’s “Sophie”, by Chez Moi. I bought a charm pack and two yards of the red fabric for the patchwork pinwheels and the border fabric, all from the same line. These are such fun fabrics in great colors! Elizabeth and I (remember, she’s my Bernina 440QE) did a blanket stitch around the outer edge of the chicks. The feet were done with a very narrow zig-zag stitch and the eyes are hand embroidered. The top is nearly completed, just need to add the final border, and then I’ll be finishing it up. Backing and binding fabrics are on order and should be here in a few days.


"Chubby Chicks"
by Black Mountain Quilts
http://www.blackmountainquilts.com/


The backing and batting have arrived and I've been busy pinning the quilt at the breakfast table


The backing is another fabric from the Moda "Sophie" collection and it almost looks like little chicken tracks. 


24 October, 2011

Making New Things


Our Quilters' Guild member, Linda G., led us in a work group to make the coolest bag for our tools. This is her very practical Peekaboo Bag. I am completely and totally captivated! This bag is large enough to hold all of the items that we need to carry to workshops and classes. Mine holds scissors, a rotary cutter, thread, feet for my machine, my Mr. McGoo sewing glasses, needles and anything else that I need to take to class. The clear vinyl window lets me see all that is in the bag. Thanks, Linda! You are the best! These are going to be great sellers at our Quilt Show!

And More New Things...


I've been having tons of fun working on projects for the Guild. I think that I have mentioned that I am a member of the local Quilters' Guild. We are 110+ members strong and we have SO much fun! We put on one of the largest Quilt Shows in Oregon, second only to the renowned Sisters Quilt Show.

 We have a booth at our show, (which always occurs on the third weekend in April,) where we sell sewing and quilting related things that we members make. This item is the very practical Thread Catcher. It is the perfect receptacle, prettily perched next to our sewing machines, ready to receive threads, clippings and cuttings. We have done other designs, but we feel as if we need to change it up from time to time. We can't expect our customers to buy the same things over and over, now, can we?.

 So this is one of the designs that I have put together for this year. Instead of the usual 4 inch tile, we are using a ceramic tile as the weighted base for the pincushion, which is made lattice style (think pie crust...) with woven strips put together to form the top of the pincushion. The pincushion also includes an emery pad, the center of the flower, for sharpening needles. The pincushion attaches to the tile with Velcro so it can be detached for portability if desired. I have two more pincushion designs to complete, both attach to the same tile/bag design, but are not quite as cute... Some ladies don't do "cute". Go figure...


I recently posted these photos on one of my Pinterest boards and have had TONS, seriously, TONS, really, I'm not kidding, TONS! of hits for this item here on my blog.  I am thinking that I need to produce this pattern for sale!