16 April, 2014

2014 Quilt Show - In the Can!

Our 2014 Quilt Show is in the can!  And look!  There is a BIG BLUE RIBBON on my quilt, which feels like kind of a big deal since I moved up from the Intermediate skill level to Advanced this year. And that put me in a whole new class with quilters who are much more experieced than I. In fact, my quilt was judged against a quilt done by a woman who recently took Best of Show.  I tell myself that ribbons don't matter to me. I loved making this quilt and learned lots along the way, but seriously, who doesn't love to have their work decorated with a big ol' BLUE RIBBON?

It was a fabulous show, as always, but I think that my poor feet are still in recovery mode.  Five whole days and lots of walking on concrete floor equals aching feet.  But it was all worth it.

We are always amazed that we start with an empty hall on set-up day...

and over the course of a few hours...

and with many hands....

we build a stellar quilt show!

Our "Design-A-Block booth is always a big hit.  Our guests lay out a quilt block on a small design board, then Guild members sew the block together and we pin them up.  These blocks are later made into quilts that go to Douglas County kids and local veterans who have been on active duty in Iraq and/or Afghanistan.  


Abbie and Faith had tons of fun designing quilt blocks.  They're BFF's.  They told me so...

One of our members, Ann G., always brings along her lovely old treadle sewing machine and stitches quilt blocks together while chatting with our guests.  Just about everyone has a memory of a loved one sewing on a treadle machine.

Our Quilts of Valor Chairperson, Pat G., set up the lovely display of our Patriotic Quilts.  We will be making many more in the near future.  We have recently learned that our local National Guard unit well be deployed to Afghanistan in June.  We will have a patriotic quilt ready and waiting for each and every one of them, that's over 80 soldiers, when they return home in 2015.  

Our member, Cheryl M., cleaned up with her stunning quilt.  She took a first place ribbon, the Mayor's Choice ribbon and BEST OF SHOW!  My photo does not do this quilt justice.  Entries are open to anyone, not just our guild members, so we are always pleased to see one of our own take Best of Show.

Our youngest entrant in the show, six year old Kyla B., was the winner of her very own Janome Hello Kitty Sewing Machine!, donated by a local vendor.  

                                      
Betty C. took a first place ribbon as well as the President's Choice award.  Betty is the resident expert in Hand Applique and is a published author on the subject. Her beautiful quilt is all hand applique AND is hand quilted!

Another guild member, Vi A., took the Viewer's Choice Award.  And it's no wonder!  Another stunner!
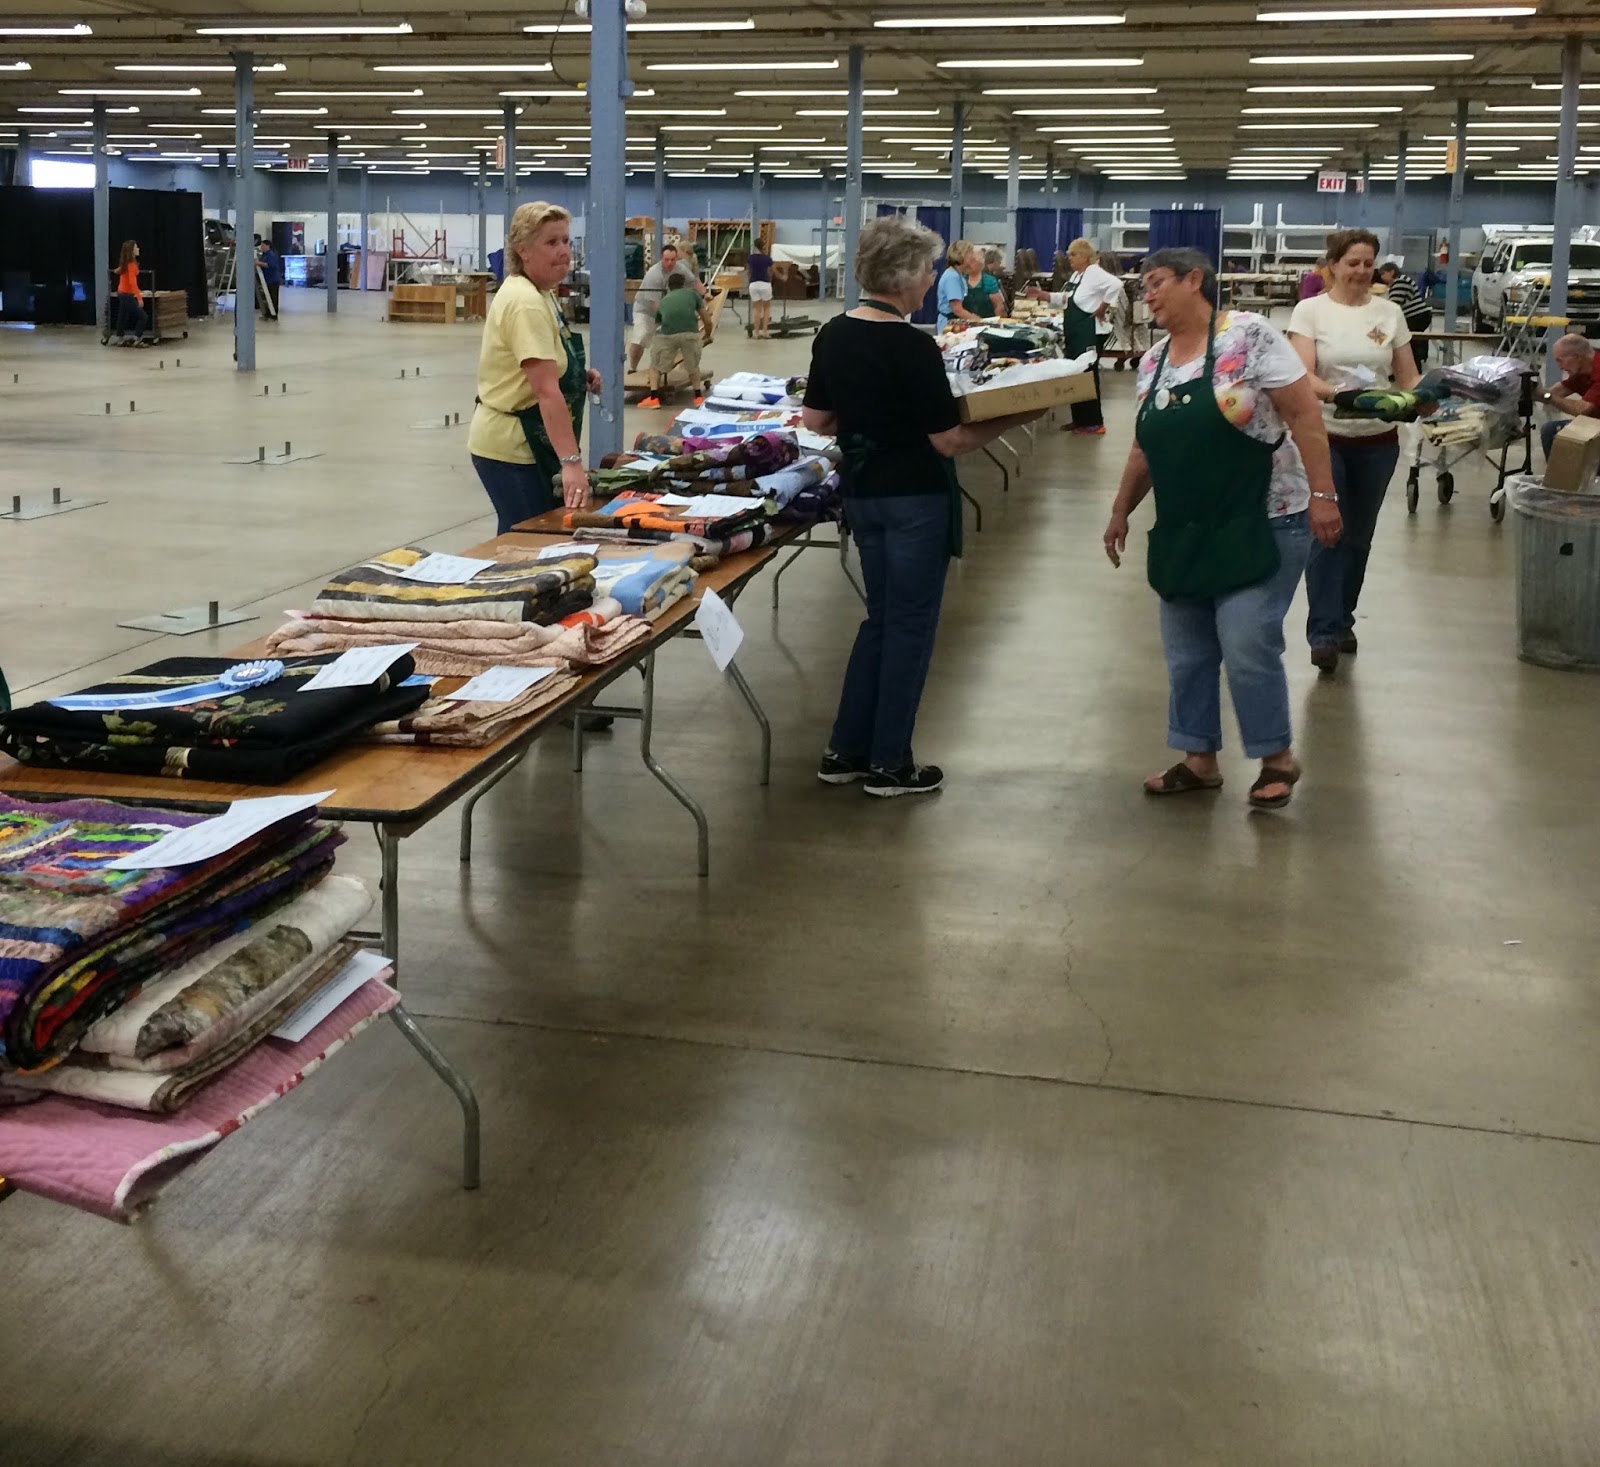
At 4:00 pm on Sunday afternoon we closed the doors and took the show down. If we are amazed at how quickly we hang our show, we are even more amazed at how quickly the show is broken down.  The quilts are removed from the poles, neatly folded and lined up on tables according to exhibitor number.

The quilts are then claimed by their owners with their receipt.

And we are back to the empty hall.  The poles are disassembled, the floor is swept and we close the doors until next year.  But planning for our 2015 QUILT SHOW begins right away.  We will be choosing our show theme and naming our next raffle quilt within the next few weeks.  

Whew!!!!!  Note to self - Get those squishy gel shoe inserts before the show next year.  

31 March, 2014

Birdsong Quilt, Finished at Last!

I love our big ol' barn, but I especially love it when it comes time to photograph a quilt. Mr. T. and I hung the quilt this afternoon, just after I finished the binding..., piped binding, of course!  This just might be my favorite quilt ever!  Oh, wait... I think that's what I say each time I finish a new one.  Pretty sure...

I have generally chosen a plain background on previous quilts so I love the sweet little sampler print that I used for this quilt.  It adds another great element to the design.  

Do you want to know how to do this method of piped binding on your quilts?  Well... I am happy to share. This beautiful binding is done entirely on the sewing machine.  There is no handwork involved, not a single stitch! I must say that this is not my method nor did I write the instructions.  This was taught to my Quilters' Guild by our member, Doris K., the very SAME Doris K. who showed me how to do needle turn appliqué, which inspired me to make this quilt. These are her directions, compiled from various sources, I believe.

You can find the piped binding directions that I used here.  The instructions suggest that you use a pintuck foot to make the piping. I have made piping without using a pintuck foot, just used my zipper foot, but I can honestly say that the pin tuck foot made things MUCH easier.  I suppose that you could use purchased piping... but your own fabric covered piping is much nicer.  I used a 4 ply, worsted weight cotton yarn made by Peaches and Creme for the center of the piping.  I believe that I purchased mine at Michaels

It is also very helpful to use blind stitch foot.  On my Bernina, that is foot #5.  It has a guide that runs perfectly along the channel between the piping and the binding and places the stitches just where they need to be.  

I hear that quilt judges love to see piped binding on quilts.  We'll see if the quilt show judges at our show love it on my quilt.  It will be judged on Thursday, April 10th.

Wish me luck! But really, as I mentioned some time ago in this post, "I don't need no stinking ribbons!"

20 March, 2014

Busy, busy!


I am happy to say that I am back in the saddle again, the SEWING SADDLE, and have recently posted a number of finished Thread Catchers at my Etsy shop, Curry Bungalow .  I have a few new fabrics that I am crazy about and they have inspired me.  


The new line from Bonnie and Camille, "April Showers", is so cute that I can hardly stand it! I love those little umbrellas.  And that red polka dot coordinates perfectly.  I love these fabrics so much that I made a new thread catcher for myself, like I need another one...


Another personal favorite is this sweet little scissors print.  The coordinating lining is a mannequin print and I put these together with some of my Avalon fabrics.  LOVE IT!

I guess I should confess,...  I am just a little bit addicted to making these things.  Can you be a little bit addicted?  Is that like being a little bit pregnant?  In any case,  I love making these things, and I especially love that others are as excited about them as I am.  

05 March, 2014

Birdsong Quilt - Preview Before Binding

The quilting for my "Birdsong" quilt was just completed by my friend, Corrine.  I got my first peek at it at our Guild meeting this week.  I am so very pleased with the way that it turned out! Corrine did a marvelous job and I am so happy with it.  I did not want the quilt to be TOO heavily quilted. That makes a quilt much too stiff, to my way of thinking, feeling more like a potholder than a comfortable quilt.  And who wants a quilt like that?

Lighting conditions were not optimum as I took a few photos today, and these do not quite give the quilt the justice it deserves.  Corrine changed thread colors repeatedly throughout the quilt, so the red birds have red quilting and the blue birds have blue.  She also used various greens and browns for the leaves.  I know that it is SO much work to cut and change thread that often, but Corrine did just that and it makes all the difference.  I cannot image what the quilting would look like if it were all one color. 

I love the feather detail on the wings and tails.

And speaking of feathers, check out the positively delicious detail of the feather quilting in the 12 inch outer border.

Corrine created a paper template to lay out the feather quilting design.

This is the variety of thread colors that Corrine used in the quilting process. WOW!

Next step will be the red piped binding .  I will be using the same method used to bind my Hanging Basket Quilt. The binding usually goes remarkably fast, once I get to it.  I hope to have a photo of the finished quilt posted soon!  It should be finished in plenty of time for our big Quilt Show in April.  Stay tuned...

26 February, 2014

Teeny Tiny Triangles


I was going to try to hold out until I had 12 blocks completed to post about my Feather Star quilt, but I just could not wait.  I have these 11 blocks pinned to the wall in my sewing room and I find myself stopping in the doorway to just stand a gaze at them as I go about my day.  I do not always love a project as I am working at it. It usually sort of needs to grow on me, but this one is different.  I really do LOVE the way that these are turning out!  Those "feather" triangles are TINY, with the short sides of the triangles measuring about 5/8th inch, but paper piecing makes it all work out in a perfectly precise way.  The blocks are not in their final order and placement will be decided later, using the tried and true squint method. Each block so far is a bit different.  I have added some of the French General fabrics from my stash for variety and they go together beautifully.


I remembered the lesson learned while making my Birdsong quilt .  I have been prepping blocks and placing them into bags so that I do not have to feel as if I am continually cutting them out.  These five blocks will keep me busy for the next few days.


Thank goodness for my thread catcher!  This is my third full bag of the trimmings.

07 February, 2014

One Brother Found... One Brother Lost

Me, workin' the camera in a big way, with Glenn and John- about 1953
Sometimes when I blog, I think that I may be putting too much out there, that I might be divulging TMI, too much information.  But I am compelled here and now to write about my baby brother, Glenn.

This is a long story that I will try to make short. I blogged not so long ago about finally locating my older brother, John.  He had kind of vanished, for his own reasons, probably very valid reasons..., and I am so happy to have found him and to be getting to know him again after over 35 years.  He's a seriously cool guy!

We have/had a younger brother, Glenn.  He suffered brain damage as a toddler and had been in a board and care home for most of his adult life.  He had been pacified with cigarettes and after all of those years of smoking he was dealing with COPD.  To make a  very long story short he died on Sunday, Februay 2, 2014 at the age of 62.  He was dealing with some very serious medical issues, and his body was not able to recover from a bout with pneumonia.

I am struck by the irony that I have very recently "found" my older brother, just to lose my younger brother. I am feeling the loss in a big way. We are a small family, without a lot of extended members, and each loss is compounded by the fact that there are so very few of us.

Love you, Glenn.  Rest in peace, and tell Mom and Dad that I love them, too.  I will see you all on the other side.

Feathered Star Test Block


I finished my Feathered Star test block today. I was up really early this morning so I copied the templates onto freezer paper and got everything ready to go.  I can't tell you how much I love getting up early to work on a new quilt.  The coffee is hot and my 16 year old cat, Bozz, is very chatty.  It's my favorite part of the day.

It took FOREVER to make this first block but the first one always takes longer than I think it should. The block is 12.5 inches, unfinished, and that means that those feathers are ridiculously TEENY! I will likely need about 25 of these blocks, maybe 20, but I never know this early in the game.  The quilt will tell me just what it wants to be as we move along.

I used leftover French General fabrics so that I could get the feel for the newer French General fabrics that I will be using for this quilt.  This block may or may not make the final cut for the quilt.  We'll see...

I had a hard time finding my background fabric and finally settled on a Kona Cotton muslin type.  It is not white-white, but more of a creamy neutral.  The photo above shows it just a smidge darker than it really is, but I am liking it so far.

The paper templates from the book that I am using are beautifully drafted and the block went together perfectly.  My points on the feathers look really good and the block lays flat!  That's all that any piecer ever wants. Oh, and did I mention that each block contains 169 pieces?  I counted!

So here I go, off into Feathered Star-land!  It is my sincere hope to have these blocks done within about two months.  If I can piece faster, I can have completed quilts faster!

Update... the next day.

I was up early again, just couldn't wait to sew.  I finished block number 2. This one went much faster than the first block, thank goodness.


30 January, 2014

Pins on Pinterest


Check this out! At this very moment in time, if you search "Thread Catcher Pattern" on Pinterest, this is what comes up.  My photos, pinned by others, occupy five of the six photos in the top row!  I don't know how long this view will last, not so long I suspect, but this is what it looks like here and now, at this very moment in the Space Time Continuum.

What does this mean?  Heck,... I don't know, probably not so much...  but I sure do like seeing that so many PINNERS are liking my patterns and designs!

29 January, 2014

Travels with Lucy and the Rustic Rooster


Lucy and I hit the road yesterday, along with my friend, Kathy H.  We girls drove down to Myrtle Creek for a class at The Rustic Rooster Quilt Shop.  Another friend and my most favorite teacher of classes ever!, Linda G., led us in making the Diva Frame Wallet.  We arrived for class at the shop, which has just relocated to great new retail space on First Avenue.  I had not visited the Rustic Rooster previously, but friends assured me that shop owner, Trina, carried fabrics that were right up my alley, and that was SO true!  And if sewing with friends while surrounded by beautiful fabrics and quilts wasn't enough, Trina served us the most delicious chocolate cupcakes with piped cream cheese peanut butter frosting. Sewing, quilts AND CUPCAKES! What could be better?

Linda always shares lots of hints and tricks that make her classes such fun.  The Diva Wallet went together very smoothly and all six of us finished our project in just over two hours.  Now that we've made one, we are all anxious to make more.  These will make wonderful gifts. Mine looks like this.

Hey, there is still some CA$H in my new wallet!  However in the world did that happen?  I was in a Fabric Shop, for goodness sake! 

After class I did a little shopping... and I just couldn't resist these. And here are my purchases, all bagged up and looking like a gift to ME!!!  Don't you just love gifting to yourself?


Kathy and I lunched at the sweetest little place, The Broadway House , located at, of course, 132 Broadway.  K. and I each had a delicious quiche, beautifully presented, I might add...


Broadway House, you had me at PIE & CAKE!
I am so looking forward to more classes at the Rustic Rooster and to going back to The Broadway House in the spring when we can dine outdoors on the deck overlooking the gardens.

27 January, 2014

Indulging Myself

You all remember that I sew in a closet, right? And that I don't have much room in said closet, right?

Even in my teeny space, I want my sewing closet to look nice and to contain some of the things that I love, like my favorite fabrics, vintage patterns, old needle cards, AND... my toy sewing machines.  I had picked up two others along the way, but recently found this new little RED one online.  I made certain that I was the winning bidder and I did very well, if I do say so! Ever the discerning cheapskate buyer/bidder, that's me.


Isn't it just the cutest little thing?  And it even works! It is a Casige "Little Modiste", and is stamped "Made in Germany in the British Zone", which dates it to between 1945 and 1949.  It is in amazing condition for it's age, which is around 65 or so... give or take.  Holy Cow!  It's even older than I am!  It even came with the original box as well as the instructions in both English and German, and what I believe are some quality control or perhaps inspections slips, also in German. 


It looks pretty sweet, sitting on the little shelf with it's sister sewing machines.  Clearly, I need to get a bigger shelf! Or a new house with a real studio...

25 January, 2014

Decisions, Decisions...

I am in the most deliciously creative mental state at the present moment. Since my Birdsong Quilt is now off to the quilter, I am dreaming of, planning for, and envisioning my next quilt. You might think that I would take this opportunity to finish the three other quilts that I have in the works,... but No-oooooooo! To my way of thinking, that just opens up a slot to begin making another quilt!  I don’t believe that I have ever enjoyed the process of choosing the pattern, colors, fabrics and the design of my next quilt as much as I am now.  I have decided to make something on the order of this one, found on Pinterest, the classic and complex Feathered Star!


I was in love with the Feathered Star even before I attended one of Marsha McCloskey's Feathered Star workshops.  You know that you have made a completely KILLER quilt block when it has about 130 (or more...) different pieces!

I will be attending my annual Quilters Retreat in February and want a new project that I can completely immerse myself in!  I have been all over the Internet, searching for the perfect pattern and fabrics.  I knew that I wanted my next quilt to be paper-pieced, I knew that I wanted to add a border using needle turn hand appliqué, I knew that I wanted the quilt to have a vintage/antique sort of a look and I knew that I wanted it to include the color RED!


I just ordered this book, "A Flock of Feathered Stars", by Carolyn Cullinan McCormick, which will provide me with the templates that I will transfer to freezer paper.  Paper piecing makes for exacting piecework, which is so very necessary when making a complex quilt with a ton of pieces per quilt block such as this. 

Light Bulb Moment! - I just realized that the author of the book that I just ordered was same author of the book that I used to make my Hanging Basket Quilt. 

The Feathered Star is one of the quilts on my Pinterest Quilt Bucket List, even though I made one about 20 years ago. There are tons of different ways to build the blocks, but so far, I am in love with the one pictured in the photo of the quilt pictured above. Mine will be different, of course, but you get the idea.

Next step, choosing the fabrics.  These shown below are beautiful and are at the top of my "maybe" list at the moment. I really love these fabrics inspired by vintage French textiles, and this new line, Le Bouquet Francais by French General, is a bit more vibrant than the generally understated colors in the lines previously offered by French General. I love the combination of red, yellow and blue. I'm thinking these fabrics, with the addition of a few more, along with an eggshell background would look stunning!  What do you think?


Update - January 30, 2014

I couldn't resist.  I ordered the Le Bouquet Francais Fat Quarter Bundle.  The package arrived this afternoon and I have been busy petting the fabrics, laying them out this way and that.  The colors are yummy and the scale of the prints will be perfect for my Feathered Star.  The bad news is that I just received a notification that the Feathered Star book that I ordered is delayed due to "inclement weather". UPS Tracking info tells me that my book is stranded somewhere in Minnesota.  I am imagining my poor book, stranded and freezing somewhere, shivering... in a big ol' semi trailer, all by itself and lonely... maybe in a snowstorm,.. or a terrible blizzard,... or a huge AVALANCHE!, just trying to make its' way to me.  Hold on, Honey, it's warmer here in Oregon!


17 January, 2014

Construction Zone! My Fresh New Look!

Had you noticed that my blog had been looking, um...a little naked?

Well, my free scrapbook style template that I have been using since I began this blog has now become a "for fee" template.  I was all set to purchase my old template, but then I started thinking about maybe streamlining and simplifying my blog look.  Kind of like a "Blog Facelift"!

I set about trying to design my own template, and I was able to come up with the look that I wanted, sort of..., but I just did not have the knowledge to fully implement it.  So I did some research online and found a designer to do the BIG work for me. Her name is Sharnee and her design studio is called  Suck My Lolly.  Sharnee is an absolute DREAM to work with! She lives way over on the other side of the planet in Australia, which is cool, because TONS of my patterns have been purchased in Australia. We are in completely different time zones and even different days of the week so when it's Friday afternoon for her, it is Thursday evening for me!  Crazy!

Anyway,... I sent Sharnee a couple of ideas and suggestions for the colors that I liked and she has built my new template into just what I was looking for.  Now my look is simple, clean, uncluttered and GIRLY! There are still a few little details to finesse, but those will be worked out soon.

Thank you, Sharnee, for helping me to give my blog a serious facelift.  I feel like a new woman!

08 January, 2014

Making The Best of My Time...


Remember, back a few months ago when I blogged about finishing my Birdsong quilt top?  I very ambitiously announced that I was going to hand quilt it and hoped to have it in the hoop "very soon".  Well, the quilt top did not make it into the hoop and sat and sat.  There were the holidays... Thanksgiving and then Christmas, and still no hooping!  I had this big revelation that I could send the quilt out for machine quilting and that means that I CAN START A NEW QUILT, which just got me all excited!

So I contacted my friend, Corrine W., who is a superb machine quilter, and she and I consulted yesterday.  I had sent her a photo of the completed quilt top and she and I had agreed to talk after our Quilters Guild meeting.  Corrine had done her homework looking around online to see how to best quilt my work in the traditional style, and she and I were of the same mind regarding how to best handle the quilting.  We talked about each portion of the quilt from the background of the blocks, to changing thread colors, to the feathers on the birds, veins on the leaves and on to the borders.  She and I think alike, which is just what I need when I am handing my work off for quilting.

Corrine says that she will have the quilt completed next month.  I will be able to have the binding on before the big Umpqua Valley Quilters' Guild Quilt Show in April!

I felt this big sense of relief when Corrine and I struck our deal.  I would have loved to hand-quilt this monster, but... I have more quilts to make and a home business to run.  And... I wanted to finish my Birdsong quilt IN THIS LIFE!  Hand quilting is not necessarily better than machine quilting.  It's just different.

Corrine will send me photos along the way as she quilts.  Can't wait to share!  And I am enjoying dreaming about the next quilt that I will make.  Endless possibilities!

20 December, 2013

A Fun Way To Give Cash at Christmas


Each year at Christmas, Mr. T. and I give cash gifts to our three adult children, along with our daughter-in-law.  They love getting cash and it certainly simplifies things for us, but cash is not the most exciting gift to give.  I wanted to let you in on what we are doing this year.  Don't worry.  I'm not spoiling their surprise.  They don't read my blog...

This year, thanks to Pinterest, I found a way to make the cash gifts feel more festive.  All five of them will find one of these origami star "ornaments" hanging on the tree on Christmas morning. They're gonna' love them!, and I'm pretty impressed, myself!


Here is how I went about it.  I found the directions for the origami star here.  You will need five bills in whatever denominations that you desire, however much your cash gift is.  The actual folding of the bills was surprisingly easy!  This star is my first try and as I said, I impressed myself! I used five $20.00 bills for my test star, but I used fifties, twenties and a ten for my final stars.  Since the bills have different shades on them, the look was a bit more colorful, but in a very subdued way.

Five Star Fronts
Five Colorful Star Backs
I made the tag in PicMonkey, my favorite online photo editing program.  They have tons of seasonal backgrounds and add-ons that give you lots of design options.  The star is attached to the tag with a small piece of double sided tape.  I punched a hole in the tag, added a ribbon for hanging and there you have it. Finito!

 Making these stars was easy! You can make your cash star gift inexpensive by using five one dollar bills, or,.. the sky is the limit!  I think that they could make an impressive cash gift year round, not just at Christmas time. You would just change up the tag to make it more seasonal.

Next... I will be making some of these star ornaments from my late mother's sheet music for the piano.  What a fine way to remember her and her wonderful musical talent at Christmas.

Give these stars a try! You will be amazed at how simple they are to make.

14 December, 2013

New Fabrics


I've been having tons of fun with some NEW FABRICS!  These five Thread were just listed moments ago at my Etsy Shop, Curry Bungalow  .  I am trying to break out of my floral box and use modern prints.  These above in the larger picture are positively delicious!  They are from the "Florence" line by Denyse Schmidt. This one just might be my new most favorite!, well... until I make the next one.


08 December, 2013

Short on Snow But Long on Pretty!


This is the view from my window today. So very pretty, isn't it? We've had some snow here in the 'Burg, not much, but enough to give the view toward the Callahan Range to the West a very  "Currier and Ives" look this morning!  Just had to share.  

01 December, 2013

My 15 Seconds of Fame

My little blog is one of the FEATURED BLOGS for the month of December at The Quilt Pattern Magazine !  How cool is that???  This is what their review looks like in the magazine.

I was notified that my review had been posted early this morning. I pretty much choked on my coffee when I read those words, "twenty-something".  Whoa!!!  That is certainly not a bad thing to be mistaken for when one is actually,... ahem.... a "sixty-something"!  My head feels so big that I just might knock my ears off the next time that I walk through a doorway!

Thanks Barbara, and thanks to THE QUILT PATTERN MAGAZINE for the lovely review!

17 November, 2013

Bigger Is Not Always Better!


I don't know why I love SMALL things, but I do.  Think kittens, puppies, babies, Singer Featherweights, Volkswagen Bugs,... I could go on and on.  So when I found the teeny tiny Steamfast Home and Away Steam Iron, I knew that it was the iron for me.  

As I have mentioned/whined about previously, I sew in a closet, REALLY, so space is at an absolute premium for me.  My pressing surface while piecing is a covered wooden TV tray that slides under the tabletop when not in use.  A full sized iron is more of a hindrance than a help. 

I should mention here that I had tried the Rowenta Classic Compact Steam Iron, but when it spontaneously combusted on my ironing table, I swore off Rowenta forever. FOREVER!

Enter the Steamfast Home and Away Mini Steam Iron.  This little gem is positively perfect for me!  It's SMALL, has a long cord, heats up quickly, and steams really nicely!  Some quilters absolutely DO NOT steam.  Me... I steam the holy heck out of everything!  It also travels nicely to classes and workshops.

Did I mention that it's inexpensive?  I found mine online for a measly $19.99 with Free Shipping!  Google it. You might just find a similar deal!

When you find something that you love, you just need to sing it's praises.  And I'm singing loud and strong about the Steamfast Home and Away Mini Steam Iron. 

Get yourself one!

03 November, 2013

Just In Case You Are Interested...


I just posted FOUR Thread Catchers over at my Etsy Shop, Curry Bungalow.  I am being contacted daily buy customers looking for my items for gifts.  It seems that there is quite a demand for my little sewing accessory! I will have my nose to the needle, working hard to keep up with demand! Slide on over to view more photos of the above items.  More to come!  Will post as soon as I complete them.